Saturday, December 7, 2013

Gobble Gobble!!!


I'm a terrible blogger - I haven't posted in 6 months, man how time flies!  Well the good news is, I have a couple of recipes I'm ready to throw your way.  In between going to school and working - I've still been able to play in the kitchen, just not as often as I would like.  I forgot how much I love just puttering around in the kitchen, strolling through the grocery store, and just letting my mind run wild with ideas.  Cooking is really a stress release for me and I love feeding people. 

I've heard on many occasions that I should be going to culinary school or have been asked why I chose cosmetology school over culinary school.  The truth is, I know how to cook - I'm not a pro and I don't have a certificate endorsing my skills, but I "get it" - it just comes natural to me.  I, HOWEVER, had no clue on how to cut, color, apply, shellac, perm, press, and all that jazz – so I chose the cosmetology path and opted to work at Central Market.  Yes, my favorite store in the WHOLE WIDE WORLD – THE NIRVANA FOR FOODIES!!!  I love that I finally get to make the world a beautiful place – one person at a time, AND play in the sacred land of food.  I’m inspired, motivated, and hungry to live life and will make a better effort to share my food adventures, recipes, and foodgasms with whoever will listen (actually more like read, but whatever). 

So, to kick of my blog frenzy I'll start with some turkey recipes.  First off, let me start off by saying - I'm not a turkey fan, but every now and then I get a craving for turkey.  I wasn't raised on turkey and for Thanksgiving we always had ham, prime rib, steaks, pork loin, etc - everything else but turkey.  I'm not sure if it was because the few times I remember my Mom trying to make it, she dried the hell out of it or because we just didn't like the taste of it.  So, when I get the craving for turkey (which is like once a year) I have to eat it in a way that it is disguised in flavor.  Here are two of my favorite ways to prepare it and actually enjoy eating it!

Turkey Chipotle Bolognese
1 ½ lbs of Ground Turkey (85/15)
2 tbsp of EVOO, Butter, Bacon Drippings, or Vegetable Oil
1 large onion, diced
3 carrots, small dice
3 celery stalks, small dice
4 garlic cloves, minced
4-8 chipotles in adobo
28 oz. can of crushed tomatoes
½ tsp to 1 tbsp. Crushed Red Pepper Flakes
1 tbsp. Kosher Salt
1 tbsp. Course Ground Pepper
3/4 c. of grated parmesan
In a large pot over medium high heat, heat the oil until it starts to ripple and add the onions, carrots, and celery; cook until the onions are translucent.  Next add the turkey, chipotles, and garlic – be sure to break the meat up into small, fine crumbles.  Add the crushed tomatoes, crushed red pepper, salt, and pepper – be sure to adjust the seasonings to your taste.  Simmer for an hour over medium low heat.  Right before serving, stir in 3/4 c. of grated parmesan cheese and mix until the cheese has melted.  Serve with spaghetti noodles, penne, or farfalle.
 
Turkey Brie and Strawberry Chipotle Panini
Roasted Turkey Breast (lunchmeat or fresh carved)
Brie Cheese, sliced into ¼” slices
Strawberry Chipotle Preserves
Sourdough Bread
In a large heavy pan over medium heat, brush EVOO across the surface of the pan.  I like to assemble the sandwich in the pan, but whatever is easier or makes sense to you – go with it.  Butter one side of the sourdough bread and place it butter side down into the pan.  Layer the turkey onto the bread in the pan, followed by the brie.  Next spread the Strawberry Chipotle preserves on the 2nd slice of sourdough bread and place it preserve side down, onto the brie.  Butter the last slice of bread while it is in the pan.  Cook until the bottom of the sandwich is golden brown; then flip it over carefully.  Place a foil covered brick or a heavy pot on top of the sandwich to press it while it is cooking.  Check it frequently; cook until it is golden brown on the second side.  Remove it from the pan and let it cool for a few minutes before cutting it – or- most importantly before eating it….unless you like to burn your mouth with melted hot cheese.


Strawberry Chipotle Preserves
12 oz. jar of Strawberry Preserves, Smucker’s Orchard‘s Finest
4 Chipotles in adobo, finely minced
Kosher Salt, pinch
In a small saucepan over medium heat, combine the strawberry preserves, chipotles and kosher salt.  Bring to a simmer and cook for 5 minutes.  Pour the preserves into a container and let it cool on the counter.  Store the preserves in an airtight container in the refrigerator.


Wednesday, June 19, 2013

Meatless Monday: Bucatini and Asparagus with Lemon Garlic Butter


Bucatini and Asaparagus with Lemon Garlic Butter

1 lb. of bucatini (I prefer De Cecco pasta)
1 bunch of Asparagus, trimmed and cut into bite size pieces
1 stick of butter , unsalted
3 to 4 garlic cloves, minced
3 tbsp. olive oil
Grated zest from (1) lemon
Juice from ½ a lemon
1 tsp. of kosher salt
1 tsp. of fresh ground pepper
Grated Parmesan Cheese

Bring a large pot of salted water to a boil.

Cook the pasta till it is al dente; remove the pasta with a pair of tongs or a spaghetti spoon and place in a large bowl.  Remove about (1) cup of the pasta water and set aside.  In the same water, add the asparagus and cook until it is tender – about 3 minutes and drain.
 
Return the pot to the stove and reduce the heat to medium.  Melt the butter in the pot until it is a light brown.  Add the garlic and cook it until it is fragrant – be sure you do not over brown the garlic.  Next, remove the pot from the stove and add the olive oil, lemon juice, lemon zest, salt and pepper - stir until everything is combined. Add the pasta and asparagus, toss to coat with the sauce.  Finish with the grated parmesan cheese.

If you want protein with this, adding grilled chicken, shrimp, or scallops would be an awesome pairing.

Sunday, June 16, 2013

Grandma's Kitchen - Spaghetti and Meat Sauce

My Grandma’s cooking was pretty straight forward – salt and pepper; nothing fancy, fairly simple - but some of the meals she made are still some of my favorite food memories.  It took me years to figure out this recipe because I didn’t have access to her recipes when she passed away.  I knew she used bacon grease to cook the meat and veggies in, but I could never get the amount of meat, veggies, and seasonings right – possible in part because she used to use freshly canned tomato sauce.  I always added different seasonings (basil, oregano, Italian seasoning) thinking that was the missing element, but in reality I was making more complicated than what it really was.  I’ve added a few things to this recipe and tweaked a few things to make it my own (the 4 cloves of garlic and the crushed red pepper), but the flavor profile of this sauce is definitely her sauce with a little kick.  The key to this sauce is the amount of bacon grease and the amount of time you let it simmer - so don't skimp on the bacon grease or the time you need to simmer it.  I did end up skimming off some of the fat from the sauce prior to tossing it with the pasta, only because I could not in good conscience consume that much grease.   Luckily, the smoky flavor was still present and after my first bite – it took me back to my childhood when I use to spend my summers with my grandparents.  In fact to be more specific, it reminded me of the time my Pappy took me and my cousins bike riding on the Towpath Trail and my cousin Marc ran into a tree, because this is what we ate prior to our bike ride that day LOL (don’t kill me Marc xoxo)!!!  Ok – I’m starting to ramble, so here is a recipe from my childhood that brings comfort to my heart when I make it – hopefully it will do the same to yours. 


Grandma’s Spaghetti with Meat Sauce

1 lb. of Ground Sirloin
2 Green Bell Peppers, diced
1 Small Onion, diced
4 Cloves of Garlic, minced
1 Jar of Ragu, Old World Style Traditional Sauce
½ c. of water
1 tbsp. of Crushed Red Pepper
1 tbsp. of Kosher Salt
½ tbsp. of Black Pepper
2 tbsp. of bacon drippings
12 oz. of Thin Spaghetti, cooked to al dente

In a large pot, melt the bacon drippings.  Add the ground sirloin, seasoning it with the salt, pepper, and crushed red pepper.  While cooking the meat, break it up into small crumbles and cook it until it is no longer pink. Next add the peppers, onions, and garlic – cooking it for an additional 5 minutes.  Add the sauce to the pot, then add the 1/2c. of water to the jar of spaghetti sauce (placing the lid back on) and shake it.  Pour the liquid into the pot and bring the sauce to a boil; reduce the heat to medium low and simmer the sauce for a minimum of 1 hour.

Thirty minutes prior to serving, bring a large pot of salted water to a boil and cook the spaghetti until al dente and drain.  Return the spaghetti noodles to the pot and place it on the stove over medium low heat.  Begin ladling the sauce over the spaghetti noodles, tossing the noodles with the sauce just until the noodles are coated with the meat sauce.  Serve the spaghetti with the extra sauce ladled over the top with grated parmesan cheese.

Saturday, June 15, 2013

Pizza with Pizzazz

I FREAKIN LOVE PIZZA - Chicago, New York, or St. Louis style; Mr. Jims, Pizza Hut, or Dominos- you name it I love it!  I don't eat it as often as I would like, but when I do indulge, I like to make it at home because I can either make it pseudo healthy or completely decadent.  Plus I can control the amount of toppings AND the way it's made; nothing is worse than ordering a pizza, only to find that almost all of the jalapenos are on one slice or the mushrooms you ordered are pretty much non-existent....so annoying!  Besides, making pizza at home is a great way to get kids involved in the kitchen and an awesome way to entertain at your home for a fun, relaxed evening with friends.

How you choose to make your pizza is up to you; you can go traditional or you can pizzazz it up, but most importantly - it should be fun.  Here are my three favorite "pizzazzed" up pizzas to make at the casa - happy noshing!


When I'm being good
Pepperoni and Kale Pizza

**Pizza Dough
Pizza Sauce
Turkey Pepperoni
Sautéed Kale (prep recipe below)
Pickled Jalapenos
Shredded Mozzarella Cheese

Prep:  Sauté (2) cups of kale in garlic oil and a ¼ c. crushed red pepper.  Once kale has wilted, season with sea salt, black pepper and juice from ½ a lemon.  Set aside and let cool.

Pre-heat the oven to 450. 
 
Roll the pizza dough out to the size and shape you prefer (round or rectangular), spread ½ c. of the pizza sauce over the dough.  Next, sprinkle the sautéed kale and pickled jalapenos over the pizza.  Top the pizza with mozzarella, followed by the turkey pepperoni.

Bake until the crust is golden brown on the edges and the cheese has melted – about 15 minutes.


When I'm being kinda good...
Chicken Caesar Pizza
**Pizza Dough
½ c. *Central Market Caesar Dressing, plus extra to dress the romaine
Fresh Mozzarella, Sliced Thin
1 Chicken Breast, cooked and finely chopped
Parmesan Cheese
Crushed Red Pepper
3 c. Hearts of Romaine, chopped

Prep:   Dice the chicken breast and season it generously with salt and pepper.  In a skillet, heat up 1 tbsp of oil (I use garlic infused oil) and 1 tbsp of butter.  Add your chicken and cook until it is no longer pink.  Cool the chicken and dice it into smaller bite size pieces.

Pre-heat the oven to 450. 

Roll out the pizza dough to either a round or rectangle.  Spread the Caesar dressing evenly over the dough.  Next place the fresh mozzarella on the pizza; I like to break off pieces of the mozzarella into smaller pieces about the size of a half dollar and place it evenly around the pizza, followed by the finely diced chicken.  Last, I like to sprinkle about 1/4c. of parmesan cheese and up to 1 tbsp of crushed red pepper on the pizza before baking it.  Bake the pizza until the cheese is melted and the crust is golden brown.

....When I'm in denial
The next step is optional.  The pizza is yummy with or without the addition of the Caesar salad on top.  I like it both ways, so it’s really what you and your family prefer.

Optional: While the pizza is cooling (10 minutes), clean your romaine and chop it into bite size pieces.  When the pizza is almost done, toss the lettuce with Caesar dressing - however much you use to dress it is up to you.  Top the pizza with the dressed romaine, slice it, and dive in.

*If you don’t have access to a Central Market, Cardini’s Caesar Dressing is a good substitute and is available in almost every grocery store.


When I don't care :)
Pecan Roquefort Grape Pizza
**Pizza Dough
Fresh Mozzarella, Sliced Thin
1 cup of seedless red grapes, sliced in half
½ c. of Roquefort cheese crumbles
½ c. of chopped pecans

Pre-heat the oven to 450. 

Roll out the pizza dough to either a round or rectangle.  Place the fresh mozzarella on the pizza; I like to break off pieces of the mozzarella into smaller pieces about the size of a half dollar and place it evenly around the pizza.   Next, place the grapes on the pizza – I prefer cut side down so they don’t roll off of the pizza when I move it.  Sprinkle the Roquefort cheese crumbles and pecans over the pizza and bake the pizza until the cheese is melted and the crust is golden brown.

The next step is the hardest step – let the pizza cool to room temp – trust me!  I tried the pizza fresh out of the oven and it was good, I let it cool to room temp and it was pure deliciousness!


**Ok, so when I make pizza at home, I either buy the dough fresh from Central Market at the Chef's Case or I'll buy the Pilsbury Thin Crust Pizza Dough which is available in the same section as the canned biscuits.  My recipes below are created using the fresh pizza dough from CM, but if you use the Pilsbury pizza dough - be sure to follow the directions on the label to prep the dough. 

Thursday, May 30, 2013

Buffalo Chicken Spaghetti and Strawberry Lemonade Dump Cake

I'm baaaaaack....after a year and half, but hey sometimes you have to lose yourself to find yourself again - right?  After being on a sabbatical I come bearing gifts - well recipes....two to be exact, with many more to follow!

I've played around with this recipe for a while and I think I've finally perfected it.  I love spaghetti and I love hot wings - so why not combine the two and create something magical and sinful!

Buffalo Chicken Spaghetti

(2) lbs. of ground chicken; 85/15
(1) small onion, finely diced
1/2 c. carrots, finely diced
1/2 c. celery, finely diced
(15) oz. can of tomato sauce
1/2 c. - 1c. of Franks Red Hot (more or less to your taste)
(1) tbsp. Sriracha (more or less to your taste)
(1) tbsp. of garlic olive oil (or garlic infused oil)
(1) tbsp. of butter
1/2 tbsp. kosher salt
27 turns of black pepper from a pepper mill
Blue Cheese
Green Onions

In a large pot heat the garlic olive oil and butter over medium high heat.  Add the onion, carrots, and celery and sweat the veggies until the onions are translucent and the carrots are soft.  Next add the ground chicken, and begin breaking it up to small crumbles - be sure to cook the chicken until it is no longer pink.  At this point you can choose to drain it or keep some of the oil - I didn't have a lot of excess fat from the chicken so I didn't drain it, but keep in mind that if you do drain it you are losing some of the flavor from the garlic oil.

OK- moving on...

Next add the can of tomato sauce, Frank's Red Hot, and Sriracha.  Out of habit, I use a little bit of water to rinse the can and pour the liquid into my sauce - but do whatever you normally do.  Bring the sauce to a boil, and reduce to medium low and simmer for a minimum of 30 minutes - the longer the better.  I simmered for almost 2 hours and stirred the sauce every 30 minutes to ensure it didn't stick to the bottom or sides of the pan.

When you're ready to nosh - I recommend serving this over spaghetti (hence the name).  I've tried this with penne, rigatoni, and orechiette - but spaghetti is my favorite.  If you're doing low carb or paleo - you can serve this over spaghetti squash or zucchini noodles.  Garnish with Blue Cheese and Green Onions.

*Alternative use for this sauce - make Buffalo Chicken Sloppy Joe's with this sauce!  Just reduce the sauce to a thicker consistency or reduce the amount of tomato sauce by half, as well as, adjust the amount of Frank's.

* * * BONUS RECIPE * * *

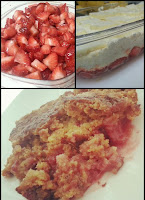
This next recipe is super simple!!!  I love dump cakes - they're a cross between a cobbler and a pie (at least I think so).  The traditional recipe that is floating around on the internet calls for canned cherry pie mix and a can of crushed pineapple which I had neither in my pantry.  It also called for white or yellow cake mix...which I didn't have either LOL!  I had a butt load of strawberries that were on the verge of going bad and a random box of lemon cake mix - so this recipe was created based on my love for strawberry lemonade and what I happen to have on hand.  It's sweet, tangy, and so not chocolate (which by the way - I'm not a huge fan of chocolate desserts).  You may need to tweak the amount of sugar used to macerate the fruit based on the ripeness of it and the natural sweetness.

Strawberry Lemonade Dump Cake


3 lbs. of fresh strawberries, diced
2/3 c. sugar
Zest from (1) Lemon
Juice from 1/2 a Lemon (just use the same lemon)
1 box of Duncan Hines Lemon Supreme Cake
2 Sticks of Butter (no exceptions or substitutions), sliced into 1/2 tbsp. slices.

Day Before
Combine the strawberries and sugar in a bowl. Cover and refrigerate over-night.

Next Day
Pre-heat oven to 350º.

Pour the strawberries (and the strawberry juice) into a greased 9x13 baking dish. Sprinkle the lemon zest over the strawberries and squeeze the juice of half a lemon over the strawberries. Next, pour the dry cake mix evenly over the strawberries and gently pat down the mixture. Dot the top of the cake mix with all of the butter and place in oven. Bake until a dark golden brown- I think it was close to an hour.

Thursday, October 27, 2011

Chocolate Pumpkin Whoopie Pies

For the cookies
1 3/4 cups all-purpose flour
3/4 cup unsweetened good quality cocoa powder
1 1/2 tsp baking soda
1/2 tsp salt
1 tbsp unsalted butter, softened
1/4 cup vegetable shortening
1/2 cup sugar
1/2 cup dark-brown sugar, packed
1 large egg
1 cup whole milk (use whole - don't try to be healthy and use something less than whole!)
1 tsp pure vanilla extract (splurge a little for GOOD vanilla - trust me it makes a difference)
For the filling
4 oz cream cheese, at room temperature
1/2 cup (1 stick) unsalted butter, at room temperature
1/2 cup confectioners sugar
1/3 cup canned solid pumpkin

DirectionsPreheat oven to 375°. Line a baking sheet with non-stick baking mat or parchment paper; set aside.

In a medium bowl, whisk together flour, cocoa powder, baking soda, and salt; set aside.

In the bowl with an electric mixer, combine the butter, shortening, and both sugars. Mix on high speed until smooth, about 3 minutes. Add egg; mix until pale and fluffy, about 2 minutes. Mix in half of the flour mixture, followed by the milk and vanilla, and add the remaining flour mixture.

Drop by the tablespoon onto prepared baking sheet, spacing 2 inches apart. Bake 12-14 minutes or until cookies spring back when lightly touched. Place baking sheet on wire rack and let cool 5-10 minutes. Remove cookies from baking sheet and transfer to wire rack to cool completely.

Filling...
In a medium bowl, mix together cream cheese, butter, and confectioners sugar on medium speed until smooth, about 3 minutes. Add pumpkin and mix until smooth, scraping down bowl as necessary.

Assemble whoopie pie...
Spoon about 2 teaspoons of filling on the flat sides of half the cookies then sandwich with remaining cookies.

Friday, October 14, 2011

Texas Minestrone

There's nothing like a big bowl of homemade soup when you're feeling under the weather.  I'm a little spoiled when it comes to soup - my Mommy used to make me homemade soup when I was sick, so now that I'm a  "big kid" I refuse to eat canned soup when I'm sick....in fact the thought of it makes me gag.  Homemade soup is so comforting and perhaps it's just a mind thing - but I think it really does help take away the "ickiness".

3 tbsp. butter
1-1.5 lbs of Ground Chuck or Course Ground Beef for Chili
1 tbsp. Tony Chachere's More Spice Seasoning
1 small onion, diced
1 green bell pepper, diced
1 can of Chipotle Tomatoes, diced
1 can of Corn, drained
1 can of Red Kidney Beans, drained and rinsed
1/4 c. Worcestershire Sauce
1 box of Beef Stock
2 c. of cooked macaroni noodles

Melt the butter in a heavy pot and add the ground beef and Tony Chachere's seasoning; stirring and breaking up the meat.  Cook the meat until it is lightly browned.  Next add the onion and bell pepper and cook until the onion is transparent.  If there is an excess amount of grease in the pot, you can drain it at this point -otherwise add the tomatoes, corn, and red beans and stir the mixture until everything is well mixed.  Add the Worcestershire and beef stock - I use anywhere between 2/3 of a box to a full box of stock.  Bring the soup to a boil and reduce the temperature to medium-low/low, cover and simmer.

In the meantime, in a seperate pot - cook the macaroni noodles according to the package.  I like to cook my pasta al dente so when I add it to my soup it doesn't get too soggy.

When you're ready to eat the soup, put about 1/4c. of the cooked macaroni noodles in a bowl and add the soup mixture to the bowl.  Sprinkle with parmesan cheese or some shredded cheddar cheese.